
GETTING STARTED
Record your first sale in Strans POS
From choosing a product to checking the receipt. Follow this workflow after pairing your checkout device with its outlet.
Before you start
- Your account and outlet are set up in the Dashboard.
- Your POS device is paired, its catalog is available, and the cashier has access. Use a demo account for practice.
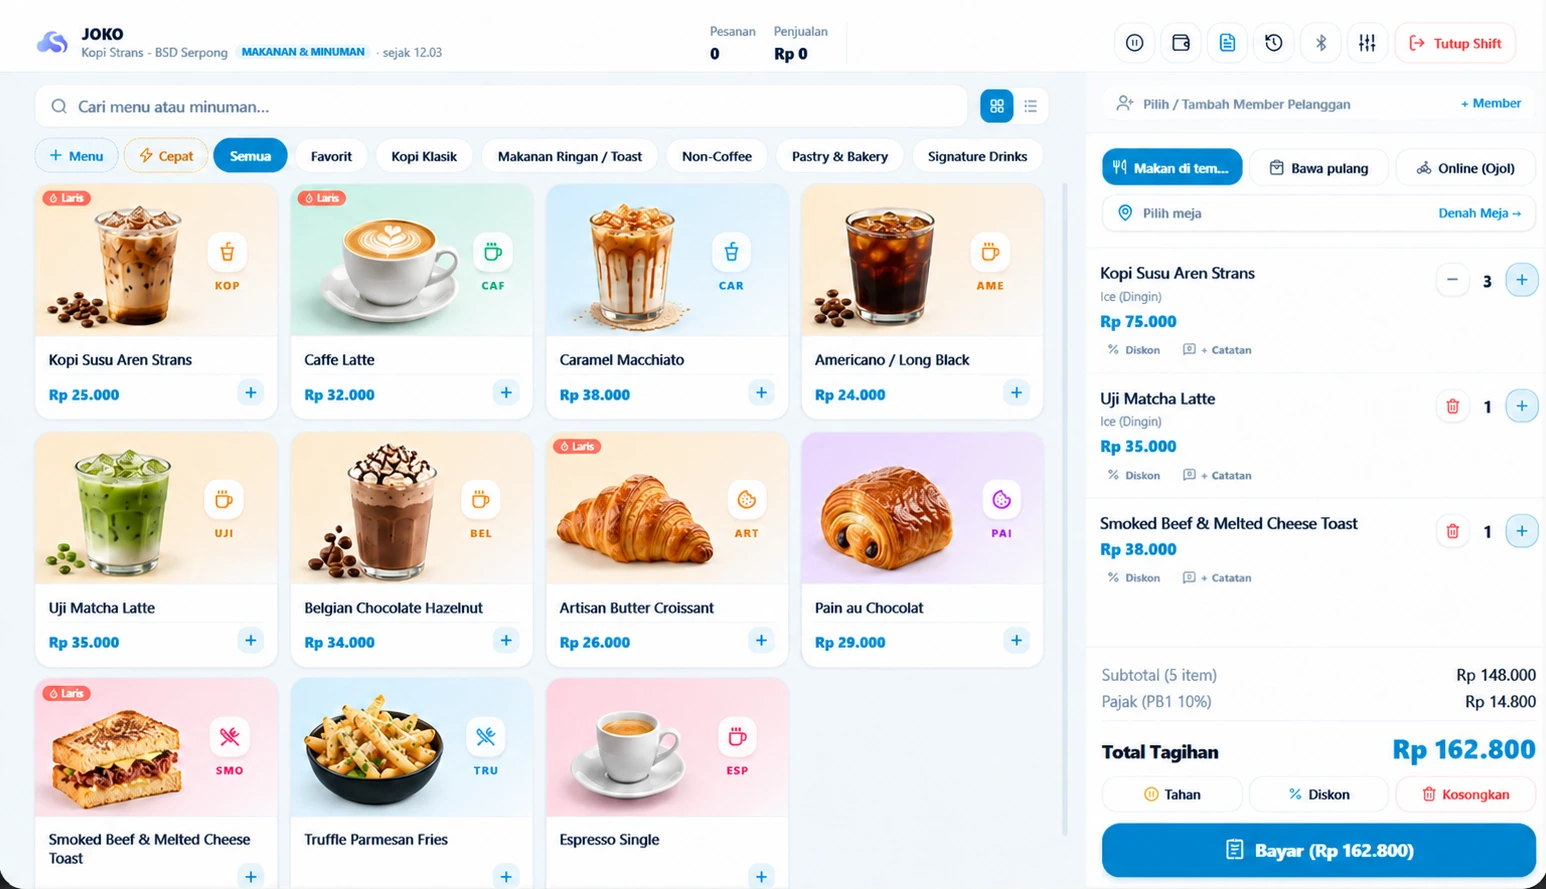
Examples use demo data. Menus can vary by business type, plan and account permissions.
Check the outlet and cashier
Check the outlet and cashier names at the top of POS. The catalog follows the paired outlet. If asked to open a shift, enter the opening cash actually placed in the till.
Choose products and review the basket
Search for a product or choose a category. Add it, select available variants, and check quantities and prices. For food businesses, select the order type and table when relevant.
Review the subtotal, discounts, taxes and service charges shown. Some changes require additional permissions.
Receive and confirm payment
Select Pay and the correct method. For cash, enter the amount received and check the change before completing the sale.
Static QRIS requires staff to verify payment. An image or payment proof is not automatic confirmation; automatic statuses require an active integration.
Check the receipt and history
After success, check the receipt number, products, total and payment method. Print or share using the options available on your device, then compare the record in History.
If connectivity was interrupted, check synchronization before repeating payment, clearing browser data or changing devices.
Check the result
The receipt and history show the same sale with the correct quantities, total and payment method.
HELP WHEN YOU NEED IT
Troubleshooting
- Missing products: check the paired outlet, product status and catalog synchronization.
- Unclear payment status: check history first to avoid recording the sale twice.